Wednesday, May 29, 2019

Garden Now -- June is Not Too Late to Start a Garden

If you planted a garden in the early spring, June is an easy-going gardening month. It's time to harvest. If you didn't do it last month, it's time to fertilize. It's also a good time to plant seeds or put in transplants. If you didn't get started in the spring, or need to add to your garden, it's not too late.

Summer vegetables can be planted now including: corn, cucumbers, beans, leaf lettuce, okra, peppers, pumpkins, New Zealand spinach, summer and winter squash, and melons.

The year-round standards, such as beets, carrots, Swiss chard, radishes, and turnips can also go in. Eggplant, tomatoes, and peppers will do well and grow rapidly when put in as transplants this month.

Don't wait. It's not too late. Get going now.

This week we'll be planting tomatoes peppers beans and okra.

Remember, if we can do it, so can you. 

Thursday, August 23, 2018

Artificial Grass in the Nest Boxes

A clean clutch of eggs.
Our Australorps were scratching out all of the bedding we were using in their nest boxes. They'd scratch out all the straw or what have you, then lay their eggs, too many of which were broken or dented when they hit the wood floor of the box.

The solution we came up with as to place mats of artificial grass in the boxes. The hens seem to like the new accommodations (they don't try to scratch out the grass) and the eggs are kept clean. If one should break, the egg drains through the mat, keeping the other eggs dry and allowing the "grass" fibers at the surface to dry quickly. Way less mess. An added bonus might be that since the egg drains away quickly, potential egg-eaters might be discouraged.

The mats of grass are attached to the floor in one back corner of the nest boxes with a flat-head screw and a washer, making it easy to lift the mat and clean under it. When necessary, taking out the screw and removing the mat for a wash with soap and water will be a snap. 
A happy hen about to lay a nice clean egg.


Friday, August 17, 2018

August Garden Chores

Time to start seeds for your fall garden!


August is a month that many gardeners in the interior areas of Southern California just wait out, because many of their gardens are just burnt up by the consistently high temperatures. However, there are some gardening activities that can go on, and a few that must: watering, pest control, and harvesting.

Watering: Drip irrigation is probably the most efficient method. Sprinklers waste water and do not necessarily get water to the root zone where it is needed. Placing a hose with just a trickle of water at the base of plants for a long period of time is good for getting the water to where it is needed, but can take all day if you have a large garden, and not many hoses.

Pest control: Putting clear plastic over empty garden beds is a tool for getting rid of some soil borne diseases, insect pest eggs, and nematodes. Cover the soil with plastic, mound soil over the edges to trap in the heat generated by the sun shining on and through the plastic, and leave it in place for a month or more. Insect pests are in full force this month, so we spray with organic pesticides and repellents . If you are going to use a spray on your plants, spray very early in the morning or in the evening to minimize the risk of the spray burning the leaves.

Harvesting: We don't consider this garden task a chore, but rather a reward for the work put in over the growing season. There are few things in gardening more rewarding than to harvest dinner minutes before it is time to prepare it.Right now we're bringing in plenty of egg plant, bell peppers, tomatoes, herbs, and of course, zucchini.

We can also plant. In our zone 9 garden, any summer vegetable can still be planted, although sometimes we  may wait until September to plant fall crops. If you have time, energy, and space, you can of course do both.

We are planting corn this month as a corn maze to be enjoyed in the fall. We also will be planting pole beans, bush beans, tomatoes, okra, squash, and heat-tolerant greens. Any heat-loving variety of vegetable will do well. One thing to keep in mind: as the days get shorter and cooler, the time to maturity of the summer crops will increase. Some of the corn we are planting is listed as 80-90 days to  maturity, so instead of harvesting our ears in mid-November, we may have to wait until Thanksgiving Dinner! (Worth the wait.)

Here's the layout for our corn maze. Also new to the front yard are birdhouse and luffa gourds (on the fence), pumpkins (under and behind the orange tree), and a tree rose (far right) .

If you want to grow your own transplants for fall crops, August is the month to start them in flats, soil blocks, or pots. We'll be starting cabbage, broccoli, cauliflower, kale, Brussels sprouts, Chinese cabbage, kohlrabi and more. They'll be ready to set out in September.

One advantage that we have enjoyed with a fall garden is that there are fewer pests in the cold weather. Also, the brassicas (cabbage family) tend to taste better after a light frost. Win, win.

A salad garden is wonderful in the fall.  A four foot square bed is more than you needs to grow your own lettuce and greens for salads. The variety you can grow from seed is so much more than you can buy as transplants in the nurseries. Start your seeds soon.  If we can do it, so can you. Give it a try!

Thursday, May 24, 2018

Instant Garden Beds

It's been a while since we posted anything new from the homestead. Right now, we're in the process now of reviving some of the garden beds that have been fallow the last year or so, and we're also making beds where there weren't beds before. However, we're in a hurry to get things going so we are making instant garden beds. We've used this method (modified according to materials available) before with good results.

Several years ago, Patricia Lanza wrote a book called Lasagna Gardening. She details there how she (almost accidentally) developed a system of establishing a garden bed by layering various organic materials (sheet composting) to form a garden bed over a few months (typically the winter months), or instantly. The layers can be put in place, and then planted in right away--provided the gardener makes planting hole in the mulch, filling it with mix of compost and garden soil or planting mix, and then transplanting a seedling into the spot.

The materials that we have used for an instant garden beds are kitchen scraps; cardboard; compost; and organic fertilizer from our goats and/or chickens (we like to use worm castings, too, but don't have any right now); and straw, wood chips, or goat bedding for the mulch on top. (See also OSU's Extension Service PDF on sheet composting.)

Geoff Lawton quickly shows how easy it is to set up a garden bed in this video.


Here's an earlier version of Geoff's method with very nice end results:


This set up is so fast, once you save up (or purchase) the materials, you could go out to make a garden after breakfast and be finished by lunch!

This technique not only provides a quick set up, but the beds can produce for years with a little preparation (adding new layers of compost, etc. covered once again with layer of mulch) before each planting.

As always, we encourage you to give gardening a try--if we can do it, so can you!

Tuesday, September 12, 2017

Our Aquaponics Efforts

We've been growing tilapia for about ten years and have had aquaponic grow beds for about eight years now.

Chocolate Peppermint in one of our grow beds.
At this writing we have three IBC totes serving as water tanks--two for fish and one as the sump tank, holding about 500 gallons of water and about 20 tilapia. The water and fish support two 4 x 4 x 1.5 foot grow beds filled with hydroton (expanded clay pellets) as the growing medium.

The water is continually circulated from the fish tanks through the growing beds and back into tanks. The fish make waste that is broken down by naturally occurring bacteria into food the plants absorb and use--cleaning the water for the fish. It is almost a closed system--the fish eat some of the plants growing in the system, but we do have to supplement their feed.

We test the water weekly (or more often if needed) to insure that the amonia-nitrite-nitrates process (bacteria breaking down the ammonia into plant-usable components) is working, and that the pH level is tolerable for plants, friendly bacteria, and fish. We add no fertilizer (the fish do that), though we do have to add chelated iron once in a while (the need indicated by chlorosis in the plants) and water as transpiration and evaporation take their tolls, but nothing else on a regular basis.

Here is a look at our fish:


The green stuff to the left in the video is duckweed grown in a floating container on the surface of the water--so that the duckweed can grow without the fish eating it. We harvest a little bit of this at a time as a daily treat for the fish. The green reflected in the water is the chocolate mint (pictured above) in the grow bed supported by these fish.

 We are planning to add a deep water culture (DWC) tank (using the rafts to grow greens directly in the water), but probably will have to move our whole system (or build an additional one) to accommodate the new tank.


Here is a video showing a large DWC operation.


(h/t to Gene Alley for the share on Facebook.) With solar power to run the pumps and grow lights, this could be a very sustainable system of food production. One major advantage/benefit to this system is that it can be done indoors (in a large warehouse) in the city, reducing transportation costs, increasing freshness and nutrition delivered to the consumer, and no chemical fertilizers, pesticides, or herbicides need be used. Input to the system could be simply water, occasional iron chelate, and food for the fish.

Australian aquaponic growers we follow have found that perch (their aquaponic fish of choice) and tilapia can be fed as we feed our chickens--greens, insects, grains, table scraps, etc. The offal from the harvested tilapia could be turned into fish emulsion fertilizer to grow crops for fish food and other crops for human consumption in soil containers and garden plots. Aquaponics could be an important cycle/system in a sustainable and cost effective food mass production system. It certainly works for us. We intend to expand our efforts and more fully integrate the system into our mini-farm production.

We encourage you to look into this ancient and yet modern and potentially self-sufficient food production technique. If we can do it, so can you!

We have read, applied, and recommend:
 Aquaponic Gardening: A Step-By-Step Guide to Raising Vegetables and Fish Together by Sylvia Bernstein.

Wednesday, September 6, 2017

Homesteader Breakfast

This is a near-perfect breakfast for me: Tomatoes and peppers from our garden, orange juice from our tree, eggs from our hens, milk and cheese from our goats.

Though we can't do this every day, let alone every meal, it is very satisfying to have meals that are completely from our mini-farm. Almost every meal has something home-grown or home-made--the more the better!

If we can do it, so can you. You don't have to be self-sufficient in everything, just endeavor to be self-sufficient in something and work form there. Try something. Work at it until you are comfortable with it and then add something new. Start with growing a few plants for food. If you like tomatoes, try growing them. Raise a couple of hens for eggs--you give them table scraps, they give you eggs and lots of entertainment! (as well as fertilizer for your plants). Try making your own bread, yogurt, or cheese.

If you have questions or need help getting started, let us know.

P. S. -- What would have made this the perfect breakfast? More of it. Perhaps with Naomi's home-made biscuits, or Denise's home-made bread or tortillas, and maybe home-grown and -smoked sausage or bacon or fish. Time to fire up the smoker....

Friday, June 23, 2017

Why and How We Make Our Own Ice Cream

Why do we make our own ice cream? Have you seen the ingredients list on a carton of ice cream? Did you know that not everything that is in that carton of ice cream has to be listed on the label? The government allows certain ingredients to be classified as "industry standards" and some as "generally regarded as safe" (GRAS) neither of which are required to be specifically listed in the ingredients.

Some things you may find listed on your favorite ice cream carton: propylene glycol (an anti-freeze, used to keep the ice cream from becoming rock-hard, and to reduce the formation of ice crystals), ethyl acetate, yellow dye #5, hydrogenated oils, high fructose corn syrup, dry milk solids, caroxymethyl cellulose, butyraldehyde, amyl acetate, diethyl glycol (egg substitute which is also used in anti-freeze and paint removers), aldehyde C-17 (cherry flavoring and a flammable liquid used in dyes, plastics, and rubber), piperonal (vanilla flavoring and a lice killer), ethyl acetate (pineapple flavoring and a leather and textile cleaner).

Here are a few more: mono- and diglicerides, disodium phosphate, benzyl acetate, mono stearate, sodium benzoate, polysorbate 80, potassium sorbate, modified corn starch, and soy lecithin.

While many of these are listed in the ingredients list, many are either industry standards (propylene glycol, e.g.) or are generally regarded as safe, and so do not have to be specifically listed. Some are listed as "artificial flavors or colors."

Some ingredients listed as "natural flavors" come from nature, but you might not think it natural to eat them. One such ingredient is castoreum, which is used as a vanilla flavoring as well as a component to raspberry and strawberry flavorings. Castoreum "is the [yellowish secretion] from the castor sacs of the mature North American Beaver (Castor canadensis) and the European Beaver (Castor fiber)." (Wikipedia: http://en.wikipedia.org/wiki/Castoreum) TMI: The castor sacs are located near the anal glands, between the pelvis and the base of the tail. They are scent "glands" used for marking territory. Castoreum is responsible for that extra-rich vanilla flavor in some store-bought ice creams! It's a yummy "natural" flavor.

Why do we make our own ice cream? So we know exactly what's in it, and that what's in it is truly natural and good to eat!

Now to the more pressing question: How do we make our ice cream?

Here is our peach sherbet with just 5 ingredients all of which you can identify and pronounce!:

Our ice cream is simple--just four ingredients for our chocolate ice cream. You can substitute your preferred milk for the goat's milk. Our blender holds about a quart, but our ice cream maker holds about 2  quarts, so we have to mix the first three ingredients with 1 quart of milk in the blender, then pour this into the maker, topping off with extra milk.

Chocolate Ice Cream Recipe

1/4  Cup Raw Honey (You could use unrefined sugar) or more to taste
1/4 Cup 100 Percent Cocoa Powder
1 Tsp Vanilla Extract
Approximately 2 Quarts of Milk (we use goat's milk)


Put sugar, cocoa, and vanilla with 1 quart of the milk into the blender. Blend for about 5 min or until starts to look creamy. Pour into your ice cream maker - top off with extra milk to the fill line. Freeze in maker according to the manufacturer's directions. We serve ours right away and it is perfect. You could spoon it into a container and let it firm up in the freezer for up to a couple of hours.

Here's our peach sherbet recipe. You could substitute other fruits for the peaches.

 Peach Sherbet Recipe

Peach sherbet in the ice cream maker
4 cups ripe peaches, chunked (you can leave the skin on)
1 1/2 cups milk
1/3 cup honey (more to taste)
pinch of sea salt
juice from two lemons

Put everything into the blender. Blend until smooth.  Then blend a little longer to force more air into the mixture.

You may want to chill the mixture in the fridge for an hour or two. When we do this, we leave it in the blender carafe so we can put it back on the blender base and whiz it up one more time before putting it into the ice cream maker. The maker we have works well enough for us to transfer our mixture right from the blender to the maker without any chilling.

Once mixture is chilled (if necessary), freeze in your ice cream maker according to the manufacturer's directions.

We served ours right away and it was perfect. You could spoon it into a container and let it firm up in the freezer for up to a couple of hours.

There are lots of yummy recipes for homemade ice cream out there on the Internet. We find it useful to put whatever fruits or veggies we have coming in from the garden in a search string with "homemade ice cream" and see what comes up. If it sounds good, we'll try it. Sometimes it's just right to have "plain ol' vanilla." Whatever the flavor, we enjoy it because we know exactly what went into it.


Bone Broth


Bone broth is good for you! It's also very tasty and easy to make.

Bone broth (or stock) is a source of minerals in forms that your body can easily absorb: calcium, phosphorus, magnesium,  and potassium.  Bone broth is rich amino acids, glycine and proline, amino acids not found in significant amounts in muscle meat, the part we most often consume. It also contains compounds that are believed to reduce inflammation of the joints: chondroitin sulfate and glucosamine.  And last but not least, bone broth contains collagen--the  basic material for bone, marrow, cartilage, tendons, and ligaments--which when broken down in the broth produces gelatin.

There's a reason mom always made you chicken soup when you were sick! 
Going back more than a hundred years, studies have shown that the amino acids, glycine and proline, that are produced when making chicken stock reduce inflammation in the respiratory system and improve digestion. 

The gelatin in bone broth can help to heal a leaky gut, which may be of specific benefit those with inflammatory or autoimmune disorders. These compounds also reduce joint pain, reduce inflammation, prevent bone loss, and build healthy skin, hair, and nails.

Homemade is better!
If you do buy broth in the grocery store, be sure to check the label. Broth, often labelled "stock," is produced  with high temperature-, fast-cooking techniques, using lots of water (to make more product) which result in a watered down, non-gelling broth. It will be missing some of the benefits of a gelatin-rich, homemade broth. MSG and other "flavors" are often added to factory broth. To get all the benefits and avoid the pitfalls, make it yourself--it's easy.

Getting your ingredients together.
The bones: when you roast chicken, beef, lamb, bison, venison, pork, turkey, duck, or goose save the bones for making broth. Keep containers in the freezer for storing the bones until you are ready to make broth. While most people like to make broth from one kind of bones at a time, you can use more than one kind in a batch. If you don't have any bones saved up to use, visit your local butcher and ask for marrow bones, oxtail, or "soup bones." To ensure plenty of gelatin, include some larger bones like knuckles, or feet--chicken feet, beef or calves' feet, pigs' feet (fresh, not smoked).  Try to get bones from grass-fed or pastured animals.

Vegetables and herbs: classic broth or stock has onions, celery, and carrots added for flavor. These also impart important minerals. Other vegetables can be added: garlic, peppers, leeks, etc. Avoid cruciferous veggies like cabbage and broccoli--they impart a strong flavor and can make the broth bitter. The classic herbs include parsley, thyme, and bay leaf.

Salt and pepper: Peppercorns add flavor. Add salt to taste only at the end of the cooking process.

Vinegar: many recipes call for a little bit of vinegar. This helps to extract minerals from the bones, but in small amounts will not change the flavor of the broth. There are plenty of recipes on the Internet. Google "bone broth recipe."

Here is one of our favorite recipes.
 (It's simple and in a slow cooker--a combination that is hard to beat.):


Simple Slow Cooker Stock


 This stock is simple as can be to make and reliably turns out well. The onion floats to the top and caramelizes with the long cooking, adding delicious flavor. You should use enough bones to completely fill the slow cooker.

Makes about 4 quarts.
A bunch of chicken bones, about 6 cups
2 chicken feet or a piece of split pig's foot
1 onion coarsely chopped
2 tablespoons of vinegar
Cold, filtered water

Place the chicken bones in a large slow cooker. Add the feet and onion to the pot, then add the vinegar and enough cold filtered water to cover the bones. Let stand for 30 to 60 minutes. Cover and cook on low for 6 to 12 hours, checking occasionally to ensure that the bones remain covered with water and adding more water as needed.

Remove the bones with tongs and a slotted spoon. Strain the stock through a fine-mesh strainer into 2-quart Pyrex measuring containers or a large heatproof bowl and its ready to use in your recipes. If not using right away, cool to room temperature, then refrigerate uncovered for several hours, until the fat rises to the top and congeals. If desired, skim off this fat (you can use it in your cooking) and transfer the stock to containers, cover, and store in the refrigerator for up to 5 days or in the freezer for many months.


From Nourishing Broth, a book we highly recommend (pp. 155-156). (Affiliate link to Amazon.com)


Storage: If you freeze it your broth in ice trays, you can add it easily to recipes that call for small amounts.


Tuesday, March 28, 2017

What About Companion Planting?

Companion planting is all the rage these days. But is there really anything to it?

With over 30 years of gardening experience, I have to agree with expert gardener Derek Fell: "I am not a believer in companion planting for insect and disease control. For example, I have not found that garlic will confuse insect pests like carrot flies and repel them from a row of closely planted carrots. Neither do I believe that certain plants don't like—or somehow like—each other's company. Vegetables are not like black walnut trees, which exude a poison from their roots that inhibits other plants from growing near them. In my experience, all vegetable plants planted with correct spacing get along fine together. Moreover, most repellent qualities in plants are released only when the plant is bruised." (Emphasis mine --DCS  Fell, Derek [2011-04-26]. Vertical Gardening: Grow Up, Not Out, for More Vegetables and Flowers in Much Less Space [Kindle Locations 1747-1751]. Rodale. Kindle Edition.)

Some plants compete for the same nutrients as others, and therefore, appear to be "bad companions." If there is appropriate spacing and proper levels of nutrients in the soil, all plants get along just fine together.

Wednesday, April 13, 2016

Spring Is In Full Swing

Our Chocolate Mint Patch
Our Chocolate Peppermint Patch

It's Springtime, and all of the springtime activities are in full swing here on the mini-farm.

The first kids of the year have arrived; Inga, one of our milk goats, surprised us yesterday morning with a buckling and a doeling. All three are doing just fine. Ilsa, Heidi, and Gretchen are expected to kid within the next two weeks or so.

Egg production is in full swing.

Our goose, Buttercup, is firmly settled onto her clutch of eggs--about fifteen of them. She is about two weeks into her 35-day task. She was off the nest today for a few minutes but returned to duty after a bite to eat and a splash in the water barrel. Wesley, our gander is a watchful, careful, sentry.

Early crops are ready to harvest: beets, turnips, rutabagas, chard, spinach, carrots, collards. A full crock of cabbage-soon-to-be-sauerkraut sits on the counter in the kitchen.

Fruit: Apples, Peaches, Citrus, and Almonds have set. Olive tree is in bloom (this year, we're expecting our first crop). Goji is also in bloom. Pecan is about to bloom.


Mints: Peppermint, Spearmint, Chocolate Peppermint, and Apple mint have are giving abundant harvests.

A month ago or so, we began starting our intended crops from seed in flats and pots in the nursery area. We are using one of our aquaponic growing beds to keep the seedlings well-watered and fertilized. We've been planting out our peppers (Bell, Pepperoncini, Padron), tomatoes (Early Girl), eggplant (Black Beauty), cucumbers (pickling and slicing), squash (zucchini), and herbs.

We still have quite a few things to plant out:

50 San Marzano tomato plants--an Italian heirloom sauce tomato. We intend to grow enough to can 75 quarts of tomato sauce this summer, which will beat the record of 50-plus quarts a couple of years ago.

Russian Black Cherry Tomatoes, Tomatillos.

Herbs: marjoram, sage, summer savory, rosemary, chives, and basil.

Dozens of pepper plants--Pepperoncini (both Greek and Italian styles), Anaheim, Poblano (Ancho), Habanero, Cayenne, Padron, and of course, Bell.

Sour Gherkins, Tigger Melons, Watermelon, Honeydew, Cantaloupe.

Squash: Spaghetti, Delicata, Acorn, Pennsylvania Dutch. We'll be using a "three sisters" approach to grow these squashes along with popcorn, and pole beans. Oh, and pumpkin.

Grapes: Red Flame (from cuttings), and Black Monukka.

If we can do this on our small lot, you can too! Start small. Grow at least one thing you like to eat. Get started.

Wednesday, August 12, 2015

August for Southern California Gardeners

For many gardeners, August is a time to relax and enjoy the fruits of their labors. It's too hot to do anything strenuous in the garden. If we've planned well and worked the plan, watering and harvesting should be about all we really have to do. Most of the plants in the garden are ready to take it easy, too after giving us much pleasure through the season, and now a plentiful harvest.
Crops for a Fall Garden
What to Plant Days to Maturity
Arugula 40
Beets 60
Broccoli 80
Brussels Sprouts90
Cabbage 95
Carrots 80
Cauliflower 75
Chard 55
Kale 60
Kohlrabi 60
Lettuce 50
Mizuna 45
Mustard 40
Onions* 60
Radishes 30
Rutabagas 75
Spinach 45
Tatsoi 45
Turnips 50
*Onions for scallions can be planted in late summer or early Fall. Onions and garlic for bulbs should be planted the first week in November for harvest in the Spring.
However, if you're not ready to wind down, in the first part of August, any summer vegetable can be planted. Especially those that love the heat: Okra, cucumbers, tomatoes, eggplant, watermelons, squash and really any crop that will finish before the days get too short in the fall. We'll be direct seeding Okra, squash, beans, dill, basil, and cukes; setting out transplants of the others.

Near the middle of the month, we will be starting our fall crops from seeds for transplant in September and October: broccoli, cabbage, kale, and cauliflower. 

We like to begin our cool season garden near the end of September because in our inland valley, some September days can be just as scorching hot as the hottest in August. Better to wait for cooler weather near the middle or end of September to set out the cool season transplants.

This chart shows good candidates for the Fall garden, along with their respective days to maturity (the beginning of harvest).  Add to the number of days to maturity another 30 days or so to sprout from seed and to grow to transplant size. In our USDA Zone 9 garden, the first frost comes in mid-December. So we have 90 frost free days from the middle of September until frost.  While many of the cool season crop can stand and even enjoy a light frost (kale, cabbage, and spinach taste better after a frost), any on this list can be safely grown and harvested before the frost.

Time to head to the store to get some seeds, seed starting potting mix, and some containers to start in.

Thursday, June 25, 2015

One of Our Favorite Dinners

This dinner we enjoyed a few nights ago may not be fancy, certainly not gourmet, but it is very satisfying, and tasty!. With the garden in full swing and harvests coming in everyday now, we have opportunity to have meals like this that are entirely from our mini-farm. This is one of our favorite dinners because everything on the plate--meat, herbs and veggies--is home grown: the roast Muscovy duck, (with celery, onions, thyme, parsley, and rosemary), sauteed garden peas (with mint), green beans, and sweet pepper.

Of course, we'd like all of our meals to be like this one: home grown. Currently, the meat, milk, fish, eggs, veggies and fruits we're harvesting account for more than 50% of the calories we need. By emphasizing variety and focusing in recent years on growing nutrient dense crops, we can provide for almost all of our nutrition needs. However, because we don't have the space to grow more calorie-rich foods--grains, potatoes, etc.--we "import" them. Ideally, we will be able in the future to have enough surplus of what we can grow, to trade for the staples we cannot grow. With each passing season we come a little closer to that goal.

For example, increasing the number of our laying hens by 25% allows for 25% more eggs than we need. These we can sell or trade. By dedicating just 10% of our growing space in the garden to "cash" crops, we have been able to raise a little money to help pay for our "imports."

You can become more self-sufficient, too. If we can do it, so can you! Start small. Grow a few vegetables. Herbs are pretty easy. Get a couple of chickens--you give them table scraps, they give you eggs! Not only will the food you grow be more nutritious, but it will be more tasty than anything you can buy at the supermarket--because you grew it!


Thursday, May 21, 2015

Spring Garden and the New Kids on the Block

The garden is happy after the much needed rains.


Red Cabbage -- Makes great sauerkraut!

"Red Salad Bowl" lettuce.

Chamomile for a soothing tea.

Sweet Banana Pepper - one of Chloe's favorites.

"Anna" Apples

The New Kids on the block.

Heidi and her brand new kids (21 May 2015); still wet. One of each: a buckling and a doeling.

Getting the hang of walking.

The doeling getting a lick from mama.

Saturday, March 14, 2015

Square Foot Gardening with Kids!


A Square Foot Garden is more than just a perfect place to grow vegetables--it is an ideal environment for sharing and teaching kids of all ages, and this book will show you how. 

If you liked Square Foot Gardening, and you have kids or grandkids, you'll love Square Foot Gardening with Kids.  It "offers you the proven methods Mel Bartholomew has developed himself to entertain and amaze the kid in all of us. Kids can learn many valuable life lessons from creating their own garden--such as the importance of following instructions and doing your chores, basic skills like counting and water conservation, and learning to appreciate the nature of food and why it is important to respect it, but more than anything, this clever, colorful new book captures the essence of growing edibles for anyone, regardless of age: it is fun and rewarding."


Click here for more information.

Thursday, March 5, 2015

Good for Beginners: Square Foot Gardening

We highly recommend this book. We're still using the principles we learned in the first edition. The second edition is even better.

Grow lots of food in a small space. For example, you can grow all of your salad veggies and a bit more in a four foot square bed.

Click here for details:
All New Square Foot Gardening, Second Edition: The Revolutionary Way to Grow More In Less Space

Tuesday, February 24, 2015

Some Suggestions for the Beginning Gardener

 If you're just getting into gardening, here are some suggestions to help you have a successful first year.

1. Start with easy crops. Here are several garden veggies that are good confidence-builders--they are fairly easy to grow, clearly show progress as they develop, are very forgiving, and generous with their bounty:

  • Beets
  • Bush Beans
  • Cherry Tomatoes
  • Garlic
  • Green Pepper
  • Lettuce
  • Onion
  • Pole Beans
  • Radish
  • Summer Squash

2. Plant your favorite(s). Even if your favorite is a little more work to grow, give it a try. There's no use in learning a new skill if you don't accomplish something pleasing for yourself?

3. Don't plant anything you're not going to eat. If you don't eat green peppers, don't grow them. Similarly, if you don't plan to eat a thousand radishes in a month's time, don't plant a thousand radish seeds. If you eat about a radish a day (that's a lot!), then plant a dozen or so every two weeks.

4. If you can't make it to the garden to work everyday, plant veggies that
don't need to be tended or harvested everyday: cabbage, peppers, tomatoes, carrots and beets.

Tuesday, February 17, 2015

February (So Far) in the Garden

Over the last couple of weeks the mini-farm has seen lots of activity.

We put in blueberries--three different varieties--and they are setting fruit already! We made a bed along the house of soil high in organic matter and therefore slightly acidic -- just the ticket for blueberries.

We will be transplanting several grape vines to new locations so our grape harvest will be low, so these berries will be a welcome alternative, along with the strawberries in the main garden. 


Cauliflower doing well. We had a lot more before the gophers started in. Now we have fewer cauliflower and hopefully no gophers.
Next, we have cabbage. Our favorite way to eat cabbage? Sauerkraut. Yummy and so good for you. We have about eight heads of this white cabbage, called Stonehead. Especially bred for those of us with hard heads? Perhaps not. This is our first year growing this particular variety so we are especially looking forward to tasting the harvest and the kraut.
This red cabbage makes great sauerkraut too. It turns out hot pink. Fun to look at and to eat.

[See Making Sauerkraut.]
The Romaine lettuce patch has suffered at the paws and jaws of the gophers. The survivors are looking good and will be ready to eat sometime in the next week or so.
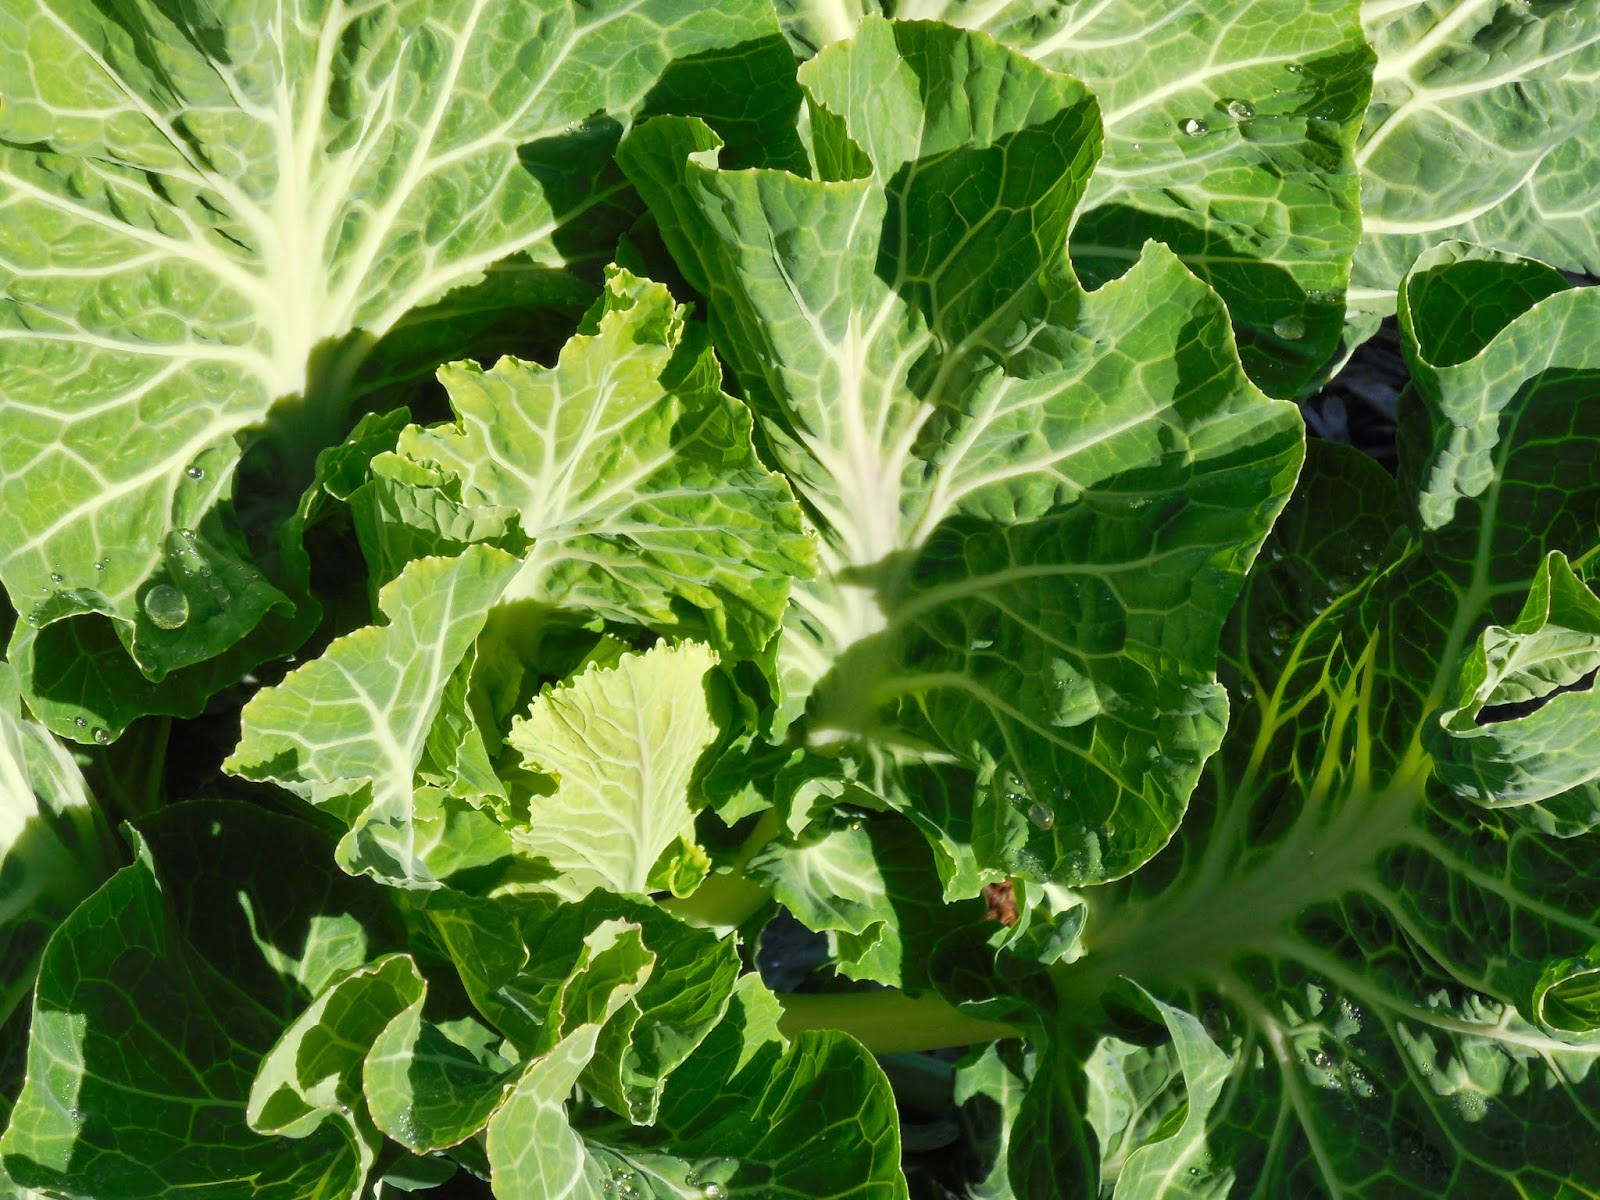
Another cauliflower. Just couldn't resist taking and sharing this picture. Morning dew still on the leaves.
White Perennial Tree Collards. If you like greens, this is the plant for you! It grows like a tree, keeps on growing year after year, and it tastes great. Our favorite way of eating this is sauteed with onions and garlic. Mmmm....

[We have cuttings for sale.]


Fava beans. Good to grow in the cooler days of spring.
Dinosaur or Lacinato Kale. Tender leaves, prolific, mild excellent flavor. Also called palm kale because it looks like a miniature palm tree as it grows--though you couldn't tell that from this photo, showing just the upper leaves. The "dinosaur" skin look of the leaves lend a hand in getting a youngster to try it.
Shelling peas. Hardly any of these make it out of the garden. Even though we have bountiful harvests, these are great to eat right out of the pod, right there in the garden!
Purple Perennial Tree Collards. These are a more robust and rougher version of the white tree collards. Deeper flavor, more antioxidants, hardier in the cold, and more drought tolerant once it is established.

[We have cuttings of these for sale.]
 We made two gallons of Spicy Carrots. See our recipe here. (Lacto-fermented)
We harvested several Pennsylvania Dutch Crookneck Squash (one was about 20 lbs. [10kg]) and some Trombocino (or Zucchetta) Squash. Trombocino are interesting in that they grow very long (our longest was over three feet), have a small seed cavity at one end, taste similar to and look like zucchini when young, and look and taste like butternut squash (pictured; public domain photo) when mature. So we get summer and winter squash off the same vine.
Our Sulmtaler chickens (pictured) have started to lay again so we are getting ready to incubate a dozen or so eggs to hatch for meat chickens. This breed is Austrian, and at one time was prized in Europe.

We have a young brood of Buff Orpingtons that will begin laying in the next month or so. These will provide eggs for us with plenty to share.

Our mama Muscovy duck has also brought out 16 ducklings from her nest. We enjoy watching them grow. Better entertainment than anything on TV.


As always, we do not post updates here to show off, but rather to show you that if we can do it, so can you. We grow much of our own food on a suburban, quarter acre lot. Ask us how, we'd be glad to share what we know.

Tuesday, November 25, 2014

Food You Can Grow in Containers

Are you a little short on garden space? Here are some things you can grow in containers. Search online for specific tips and techniques.

Tree fruits

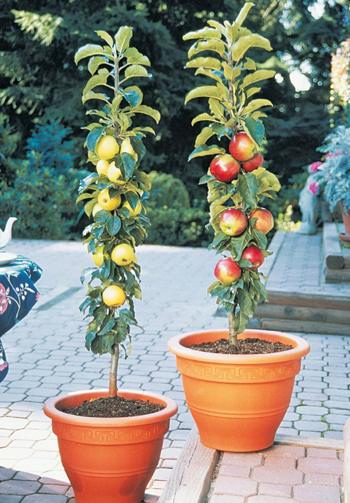
1. Apples can be grown in a container; you can also grow them on the balcony or other small space using a technique called espaliering.
2. Kumquats
3. Avocados
4. Blackberries
5. Blueberries (helpful video from Dave's Nursery)
6. Pomegranate
7. Cherries
8. Figs
9. Pears

Citrus fruits

Citrus trees are good for beginners and are easy to grow indoors.
10. Dwarf oranges
11. Grapefruit
12. Tangerines
13. Meyer lemons
14. Limes

Tropical fruits

Tropical fruits can be easy to grow indoors. (Moss in the City has container tips)
15. Bananas
16. Pineapple
17. Papaya
18. Guavas

Surprises

19. Asparagus (Some say no, but others have had some success with this in containers.)
20. Aloe Vera
21. Strawberries
22. Tea
 23. Quinoa!

Of Course...

24. Tomatoes
25. Summer squash
26. Other squashes, like acorn and pumpkin
27. Hot Peppers
28. Sweet peppers
29. Cucumbers

Melons

Look for compact or bush varieties. Growing vertically on a trellis is also an option.
30. Small cantaloupe
31. Jenny Lind melon (an heirloom cantaloupe)
32. Golden Midget Watermelon

Herbs

Most herbs will to well indoors in containers.
33. Basil
34. Oregano
35. Parsley
36. Rosemary
37. Chives
38. Catnip
39. Thyme
40. Sage
41. Parsley

Leafy Greens

42. Kale
43. Mesclun greens
44. Spinach
45. Swiss chard
46. Lettuces
 47. Mustard greens
48. Collard greens
49. Arugula

Root Vegetables

50. Carrots
51. Beets
52. Potatoes

Other

53. Sprouts
54. More sprouts: mung bean and lentil sprouts
55. Wheat grass
56. Kohlrabi
57. Turnips
58. Rutabagas
59. Celeriac
60. Parsnips
61. Jerusalem Artichoke
62. Sugar snap peas
63. Rhubarb (not ideal in a container, but it can work)
64. Mushrooms (tips online)
65. Pole Beans